I love to knit hats! But the first time I tried, I discovered a problem. I was cooking along on the body of my hat, using a circular needle that was just the right size. It worked fine–until I got to the decreases. Soon, there were too few stitches to fit comfortably around my needle.
Most knitting patterns tell you to switch to double pointed needles when you start to have fewer stitches than will go around your circular needle. This was a disaster for me! I don’t like to use straight needles or double pointed needles because often when there are only one or two stitches left on a given needle, said needle will slide out of the stitches and clatter to the floor. EEEEWWWW how I hate that!
Then I found this website: How to knit small circumferences using one long circular needle. This was the answer! I didn’t need the dreaded double points at all. Instead of using a cable needle with a cable just long enough for my hat, I could use one with a really long cable, and knit a circular object of any size. I studied that website above for a long time, and finally understood the technique. I love showing people how to do this! It’s one of those things you have to see to understand, so at long last, here are my photos of the process.
- Using a long,circular needle (I like them 40″ for most projects), cast on the number of stitches you will need to begin your project.
- When you have cast on the number of stitches you need, slide them to the cable portion of the circular needle.
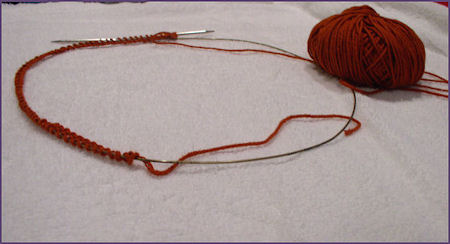
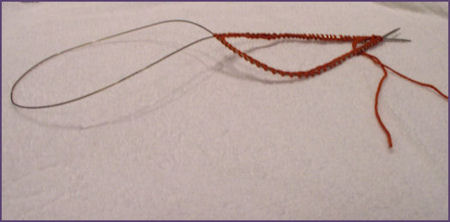
- With all of the stitches still on the cable, count until you reach the halfway point in your total number of stitches and bend the cable to pull a section of cable out between the stiches as shown. (You don’t have to divide your stitches in half… for example, if your pattern makes more sense to divide them some other way, that’s ok, too.)
- Continue pulling the loop of cable as you slide the divided stitches onto each needle. In this picture, the excess cable is pulled out in between the divided stitches and each half of the stitches are on a needle.
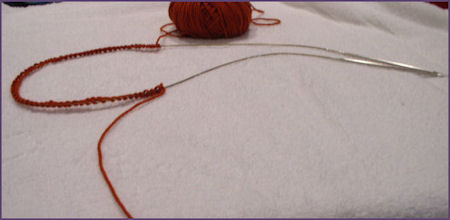
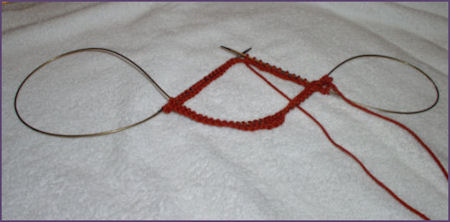
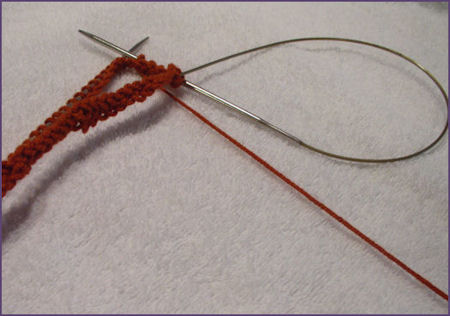
- Join the stitches to form a ring, being careful that they are all oriented around the ring so that the bottoms of the stitches are on the inside of the ring. This will ensure that the ring is not twisted.
I’ll explain my favorite join here, though you might prefer a different method. To join, I slip the first cast on stitch from the right to the left needle, then I slip the last cast on stitch from the left to the right, passing it over the first cast on stitch. For some reason, this is the only method that has enabled me to keep from having a gap in my circle (also called a “ladder”).
(Since writing that part about my favorite join, I’ve found a website that shows drawings of it, here:
http://www.tata-tatao.to/knit/closeup/e-twocircular.html
It says it’s not possible to knit small circles on one long needle but we know different! –SMILE!)

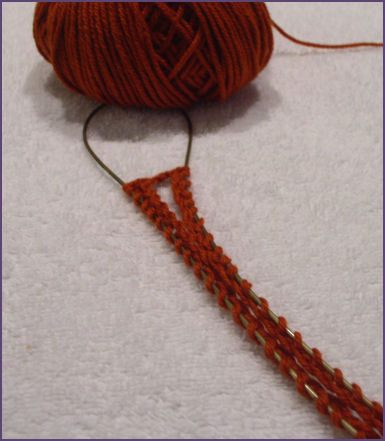
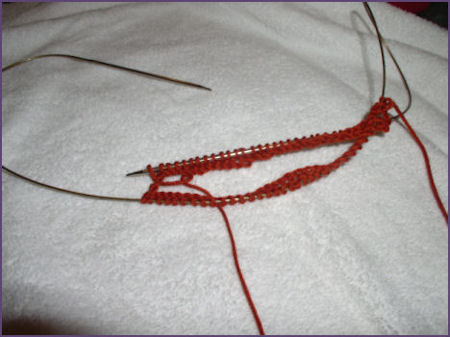
- Pull the right needle through so you have some cable on your right needle with which you can make a second loop. At this point you will see that the stitches that had been on the right hand needle are now on the cable.
- Knit the first half of the stitches from the left needle onto the right.
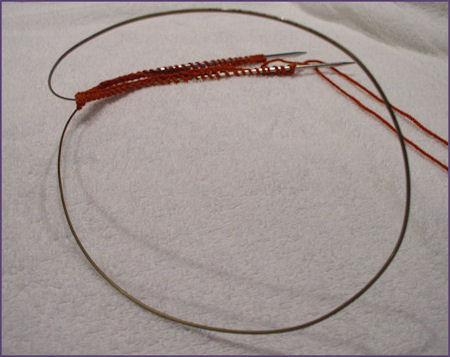
- When you have completed the first half of the stitches, your left needle will be empty and you will see the excess cable that used to form the loop on the left side.
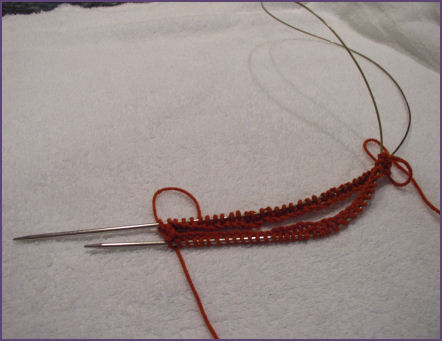
- pull the large loop (shown at the right of the picture) to slide the second half of the stitches up to the left needle so you can knit those. Be careful not to pull the needle all the way out of the stitches!
- Pull the right needle out so that you have some cable to form the second loop (as in Step 6). Now you can knit the other half of the stitches of the first round. When you get to the end of this half, pull the cable loop and slide the stitches around and start again. There! It’s that easy!!
I should mention that Fiber Trends has put out an excellent booklet on this technique, called, The Magic Loop. This booklet is very helpful for explaining the technique in detail, and gives you a couple of patterns to get you started. I strongly suggest that you get one as a handy reference guide. I have to say that this method of knitting is a “techniqe,” not a pattern, and you can use this method for virtually ANY circular knitting. If your pattern calls for double points and instructs you to divide your stitches in a specific way among the needles, you can place markers on your circular needle to indicate where those divides for the double points would have been.
I hope these pictures have been helpful! If I can improve my explanation in any way, please let me know. (My e-mail address is at the bottom of the page. You can leave me a comment on this page.)
Retailers Who Sell the Magic Loop Booklet
(in no particular order)
KnitPicks
The Knitting Zone
Patternworks
Jimmy Bean’s Wool
Handknitting.com
Inspirations Yarn
Woobee KnitShop
Elizabeth’s Fiber and Yarn Catalog
Karp Styles
The Knitter.com
Crochet-Knit Dot Com
Carodan Farm Wool Shop
The Mannings — This link goes to the site catalog; enter the search term “Magic Loop.”
Back to Main Page
Last Update: August 8, 2005